
| 일 | 월 | 화 | 수 | 목 | 금 | 토 |
|---|---|---|---|---|---|---|
| 1 | 2 | 3 | 4 | 5 | 6 | |
| 7 | 8 | 9 | 10 | 11 | 12 | 13 |
| 14 | 15 | 16 | 17 | 18 | 19 | 20 |
| 21 | 22 | 23 | 24 | 25 | 26 | 27 |
| 28 | 29 | 30 | 31 |
- 스택 자바 코드
- 큐 자바 코드
- 클래스
- 2022 플러터 안드로이드 스튜디오
- 안드로이드 유닛 테스트 예시
- android retrofit login
- Rxjava Observable
- rxjava disposable
- rxjava hot observable
- 서비스 vs 쓰레드
- jvm이란
- 안드로이드 레트로핏 crud
- rxjava cold observable
- android ar 개발
- 안드로이드 유닛 테스트
- 멤버변수
- 2022 플러터 설치
- 서비스 쓰레드 차이
- 스택 큐 차이
- 객체
- 안드로이드 라이선스
- 안드로이드 레트로핏 사용법
- 자바 다형성
- 안드로이드 유닛테스트란
- jvm 작동 원리
- 안드로이드 os 구조
- ar vr 차이
- ANR이란
- 플러터 설치 2022
- 안드로이드 라이선스 종류
- Today
- Total
나만을 위한 블로그
[Android] AlarmManager란? 사용 예시 본문
※ 하단의 예시 코드는 실제로 사용하기 전에 반드시 리팩토링한다
CMC 활동을 하며 정해진 시간에 raw 폴더의 알람음을 사용해 알람을 울리는 기능을 구현해야 해서 AlarmManager와 포그라운드 서비스를 같이 사용해 구현했다.
사용해 보지 않은 요소라 포스팅으로 정리한다. 아래는 안드로이드 디벨로퍼 링크다.
https://developer.android.com/develop/background-work/services/alarms/schedule?hl=ko
알람 예약 | Background work | Android Developers
이 페이지는 Cloud Translation API를 통해 번역되었습니다. 알람 예약 컬렉션을 사용해 정리하기 내 환경설정을 기준으로 콘텐츠를 저장하고 분류하세요. 알람 (AlarmManager 클래스 기반)을 사용하면 애
developer.android.com
AlarmManager 클래스 기반 알람을 쓰면 앱을 쓰지 않을 때 시간 기반 작업을 할 수 있다. 알람을 사용한 일기예보 다운로드 같이 하루에 1번 서비스를 시작하는 장기 실행 작업을 시작할 수 있다.
알람엔 아래 특징이 있다
- 지정된 시간 or 정해진 간격으로 인텐트 실행
- 브로드캐스트 리시버와 같이 알람을 써서 작업(JobScheduler) or WorkRequest를 예약해서 다른 작업을 실행할 수 있다
- 앱 외부에서 작동하기 때문에 알람을 쓰면 앱이 실행 중이 아니거나 기기가 대기 상태일 때도 이벤트, 작업을 트리거할 수 있다
- 앱의 리소스 요구사항 최소화에 도움이 된다. 타이머, 지속 실행되는 서비스를 쓰지 않고 작업을 예약할 수 있다
앱이 실행 중인 동안에 발생하는 시간 기반 작업은 Timer, Thread와 Handler 사용을 고려하라. 이 접근법을 쓰면 안드로이드가 시스템 리소스를 더 효율적으로 제어할 수 있다...(중략)...앱에서 set(), setInexactRepeating(), setAndAllowWhildIdle()을 호출하면 제공된 트리거 시간 전에 알람이 울리지 않는다
안드로이드 12(api 31) 이상에선 절전 모드, 잠자기 모드 같은 배터리 절약 제한이 적용되지 않는 한 시스템이 제공된 트리거 시간으로부터 1시간 안에 알람을 호출한다
앱에서 setWindow()를 호출하면 트리거 시간 전에 알람이 울리지 않는다. 배터리 절약 제한사항이 적용되지 않는 한 알람은 지정된 시간 안에 제공되며 지정된 트리거 시간부터 시작된다. 앱이 api 31 이상을 타겟팅한다면 시스템은 시간 창이 있는 부정확한 알람의 호출을 10분 이상 지연할 수 있다. 따라서 60,000 아래의 windowLengthMillis 매개변수 값은 60,000으로 잘린다
< 대략 일정 간격으로 반복 알람 >
setInexactRepeating()을 호출하면 시스템은 여러 알람을 호출한다
1. 첫 알람은 지정된 시간 안에 울리며 지정된 트리거 시간부터 시작된다
2. 후속 알람은 일반적으로 지정된 시간대가 지나면 울린다. 알람 연속 호출 간 시간은 다를 수 있다
< 정확한 알람 설정 >
미래의 정확한 시점에 정확한 알람을 호출한다. 대부분 앱은 부정확한 알람을 써서 여러 일반적인 사용 사례(하단 정확한 알람이 필요하지 않을 수 있는 사용 사례 참고)를 완료할 수 있다. 앱의 핵심 기능이 정확한 시간에 맞춰진 알람에 의존한다면 정확한 알람을 대신 써도 된다
아래 함수 중 하나를 써서 정확한 알람을 설정할 수 있다. 목록 하단에 가까울수록 시간 제약이 더 심한 작업을 처리하지만 더 많은 시스템 리소스를 요구하게 정렬된다
- setExact() : 다른 배터리 절약 조치가 적용되지 않는 한 거의 정확한 시간에 알람 호출. 앱 작업이 유저에게 시간적으로 매우 중요하지 않다면 이걸 써서 정확한 알람을 설정하라
- setExactAndAllowWhileIdle() : 배터리 절약 조치가 적용된 경우에도 거의 정확한 미래 시간에 알람 호출
- setAlarmClock() : 정확한 미래 시간에 알람 호출. 유저에게 매우 잘 표시되므로 시스템에서 전송 시간을 조정하지 않는다. 시스템은 이런 알람을 가장 중요한 알람으로 식별하고 알람 전달을 위해 필요하다면 절전 모드를 종료한다
앱이 이 함수를 써서 정확한 알람을 예약하면 알람 호출이 배터리 수명 같은 기기 리소스에 상당한 영향을 줄 수 있다...(중략)
JobScheduler라는 게 나오는데 이것은 아래와 같다.
https://developer.android.com/reference/android/app/job/JobScheduler
JobScheduler | API reference | Android Developers
developer.android.com
앱 자체 프로세스에서 실행될 여러 유형의 작업을 스케줄링하기 위한 프레임워크. JobInfo를 참조해서 실행 가능한 작업 유형, 구성 방법에 대한 자세한 설명을 볼 수 있다. JobInfo 객체를 만들고 JobScheduler에 schedule()로 전달한다. 조건이 만족되면 시스템은 앱의 JobService에서 이 작업을 실행한다. JobInfo 생성 시 JobInfo.Builder()를 써서 작업 로직을 구현하는 서비스 컴포넌트를 식별한다
작업 실행 시점을 지능적으로 결정하며 가능한 작업을 배치, 지연시켜 실행한다. 일반적으로 작업에 마감 시간을 지정하지 않으면 JobScheduler의 내부 큐 상태에 따라 언제든 실행될 수 있다
api 30부터 JobScheduler는 과도하게 실행되는 앱을 제한한다. schedule()이나 비슷한 함수를 매우 높은 빈도로 호출하면 시스템에 과부하가 걸릴 수 있다. 이걸 막기 위해 JobScheduler는 타겟 sdk 버전과 상관없이 앱 실행을 제한한다
참고로 AlarmManager는 api 1부터 존재했지만 JobScheduler는 api 21에 추가됐다.
둘의 차이는 뭔가? JobScheduler의 설명에서 볼 수 있듯 JobScheduler는 어떤 조건이 갖춰졌을 때에만 특정 작업 실행을 예약하는 조건 기반 스케줄링을 구현할 때 사용할 수 있다. 반면 AlarmManager는 조건을 따지지 않고 특정 시간이 되면 or 일정 주기에 따라 특정 로직을 실행하는 시간 기반 스케줄링을 구현할 때 쓸 수 있다.
아래는 둘을 비교하는 스택오버플로우 링크다. 2017년에 작성된 내용이지만 구현 시 어떤 예외처리를 추가해야 할지 고려할 때 좋은 참고가 될 것 같다.
이후 이어지는 내용에선 AlarmManager만 다루고 다른 요소와의 비교는 하지 않는다.
Alarm Manager vs Job Scheduler vs ScheduledThreadPoolExecutor
this question is just to get some ideas on these concepts to see what people in the industry use these for. If you can just give a few example uses for each of these, I would greatly appreciate it...
stackoverflow.com
< AlarmManager >
시스템 수준에서 작업을 스케줄링한다. 시스템 수준 알람 서비스에 접근할 수 있게 하며 앱이 자체 생명주기 범위 외에서 실행되거나 반복돼야 하는 작업을 스케줄링할 수 있다. 이를 통해 앱 프로세스, 모든 안드로이드 컴포넌트가 시스템에 의해 정리된 후에도 앱이 특정 기능을 수행할 수 있다
일반적으로 미래에 서비스를 시작하기 위해 PendingIntent를 보내는 데 사용된다. AlarmManager는 경과된 간격, 특정 시점에 서비스를 트리거한다. 두 옵션 모두 긴급 알람인 경우 기기가 잠들어 있어도 깨울 수 있다
이것의 장점은 불규칙 간격, 시간으로 서비스를 보낼 때 나타난다. 안드로이드 시스템은 배터리 수명을 유지하기 위해 비슷한 간격, 시간을 가진 알람을 그룹화해서 처리한다. 여러 앱의 알람을 그룹화해서 시스템은 기기 깨우기, 네트워크 연결을 자주 발생하지 않게 할 수 있다
사용 시 고려할 문제는 알람이 기기 재부팅 시 삭제된다는 것이다. 앱은 매니페스트에 RECEIVE_BOOT_COMPLETE 권한을 등록하고 브로드캐스트 리시버에서 알람을 다시 스케줄링해야 한다
다른 문제는 잘못 설계된 알람이 배터리 소모를 유발할 수 있다는 것이다. AlarmManager는 기기를 깨우고 알람의 정확한 시간을 설정할 수 있지만, 문서에선 네트워크 작업 수행 시 이런 기능을 주의해야 한다고 말한다. 알람 묶기(batch alarms)를 피함으로써 기기 배터리 소모 외에도 앱이 서버와 동기화할 정확한 시간을 설정하면 모든 앱 설치가 같은 시간대에 서버와 동기화를 시도할 경우 서버에 과부하가 걸릴 수 있다. 이 문제를 피하려면 알람 간격, 시간에 무작위성을 추가하는 게 좋다
AlarmManager는 앱이 정확한 시간, 불규칙 간격으로 로컬 이벤트를 수행해야 할 경우 스케줄링에 적합하다. 알람 시계, 리마인더 앱은 좋은 AlarmManager 사용 사례다. 그러나 문서에선 네트워크 관련 작업을 스케줄링하는 데 AlarmManager를 쓰지 말 것을 권장한다. 네트워크 관련 작업에 더 적합한 옵션을 확인한다
< JobScheduler >
네트워크 작업을 효율적으로 수행하는 데 도움을 준다. JobService는 JobInfo.Builder()에서 선언된 기준에 따라 실행되게 스케줄링된다. 이 기준엔 기기가 충전 중일 때, 유휴 상태(idle)일 때, 네트워크에 연결돼 있을 때, 계량되지 않은 네트워크(unmetered network)에 연결돼 있을 때만 JobService를 실행하는 게 포함된다
JobInfo에는 JobService를 실행하기 위한 최소 지연 시간, 특정 마감 시간도 포함될 수 있다. 이런 기준에 하나라도 부합하지 않으면 Job은 시스템 대기열에 쌓여 나중에 실행된다
시스템은 알람이 스케줄링되는 방식과 비슷하게 이런 작업들을 배치해서 네트워크 연결 시 배터리 수명을 아끼려고 시도한다
개발자는 JobService를 자주 지연시키는 스케줄러에 대해 우려할 수 있다. 작업이 자주 지연되고 데이터가 오래된 경우 이런 상황을 알고 싶을 수 있다. JobScheduler는 JobService가 재스케줄링됐거나 실패했는지 등의 정보를 리턴한다. 이런 시나리오를 처리하기 위해 JobScheduler는 백오프, 재시도 로직을 내장하고 있지만 개발자가 자체적으로 이런 시나리오를 처리할 수도 있다
JobService를 상속하려면 onStartJob(), onStopJob()을 재정의해야 한다. onStartJob()은 Job의 콜백 로직을 두는 곳이고 메인 쓰레드에서 실행된다. 개발자는 장기 실행 작업 시 쓰레딩을 책임져야 한다. onStartJob()에서 별도 쓰레드에서 처리가 필요하면 true를 리턴하고, 메인 쓰레드에서 처리 가능하고 그 작업을 위해 더 이상 할 게 없다면 false를 리턴한다. 개발자는 Job이 완료되면 jobFinished()를 호출하고 추가 작업 재스케줄링 여부를 결정해야 한다
onStopJob()은 초기 JobInfo 매개변수가 더는 충족되지 않을 때(해당 매개변수가 요구사항인 경우 유저가 기기를 분리할 때) 작업을 중지하거나 정리하기 위해 호출된다
JobService 구현 시에는 고려할 게 많지만 AlarmManager보다 더 많은 유연성을 제공한다. 다른 장점은 스케줄된 작업이 시스템 재부팅 후에도 유지된다는 것이다
단점은 이 답변 작성 시점(2017년) 기준으로 api 21 이상에서만 호환된다. JobScheduler의 백포트는 기술적으로 존재하지 않지만 비슷한 도구로 GCM Network Manager가 있다
아래는 AlarmManager 함수들을 설명하는 디벨로퍼다.
https://developer.android.com/reference/android/app/AlarmManager
AlarmManager | API reference | Android Developers
developer.android.com
이 클래스는 시스템 알람 서비스에 접근할 수 있게 한다. 이 서비스는 앱을 미래 특정 시점에 실행되게 예약할 수 있다. 알람이 발생하면 해당 알람에 등록된 인텐트가 시스템에 의해 브로드캐스트되고 대상 앱이 이미 실행 중이 아닌 경우 자동 실행된다. 등록된 알람은 기기가 수면 상태일 때도 유지된다. 하지만 기기가 꺼지고 재부팅되면 삭제된다
AlarmManager는 알람 리시버의 onReceive()가 실행 중인 동안 CPU 수면 잠금을 유지한다. 이는 브로드캐스트 처리가 완료될 때까지 기기가 수면 상태로 전환되지 않는 것을 보장한다. onReceive()가 리턴되면 AlarmManager는 이 wake lock을 해제한다. 이는 핸드폰이 특정 경우 onReceive()가 완료되자마자 수면 모드로 전환될 수 있음을 의미한다. 알람 리시버가 Context.startService()를 호출한 경우 요청된 서비스가 실행되기 전에 핸드폰이 수면 모드로 전환될 수 있다
이걸 막으려면 브로드캐스트 리시버, 서비스가 별도의 wake lock 정책을 구현해서 서비스를 쓸 수 있을 때까지 핸드폰이 계속 실행되게 해야 한다
AlarmManager는 앱이 실행 중이지 않아도 특정 시간에 앱 코드를 실행하려는 경우를 위해 설계됐다. 틱, 타임아웃 등 일반적인 타이밍 작업엔 Handler를 쓰는 게 더 쉽고 효율적이다
api 19(안드로이드 킷캣)부터 알람 전달이 정확하지 않다. OS는 알람을 이동시켜 깨우기 횟수, 배터리 사용량을 최소화한다. 엄격한 전달 보장이 필요한 앱을 지원하기 위한 새 api인 setWindow(), setExact()를 참고하라. 타켓 api 버전이 19보다 낮은 앱은 모든 알람이 요청된 시점에 정확히 전달되는 이전 동작을 계속 경험하게 된다
AlarmManager는 알람, 리마인더 등 네트워크 작업이 아닌 로컬(=핸드폰)에서의 작업을 정해진 시간에 호출하기 위해 사용할 수 있는 클래스다. 이 말은 AlarmManager를 쓴다고 해서 일반적으로 생각하는 알람이 울리진 않고, 알람음을 설정해서 울리게 하는 로직은 개발자가 직접 구현해야 한다는 것이다.
또한 기기 재부팅 시 AlarmManager에 설정된 알람은 삭제되기 때문에 매니페스트에 RECEIVE_BOOT_COMPLETED 권한을 설정하고 기기 부팅을 감지하는, 브로드캐스트 리시버를 상속한 클래스를 구현해야 한다. 이 클래스에서 onReceive()를 재정의하게 되는데 onReceive()의 인텐트에서 action의 값이 android.intent.action.BOOT_COMPLETED인 경우의 처리를 추가해야 한다. 이에 관한 기본적인 내용은 아래 링크를 참고한다.
https://developer.android.com/develop/background-work/services/alarms/schedule?hl=ko#boot
알람 예약 | Background work | Android Developers
이 페이지는 Cloud Translation API를 통해 번역되었습니다. 알람 예약 컬렉션을 사용해 정리하기 내 환경설정을 기준으로 콘텐츠를 저장하고 분류하세요. 알람 (AlarmManager 클래스 기반)을 사용하면 애
developer.android.com
그럼 실제로 AlarmManager를 써서 간단한 알람을 구현해 본다. 위에서 말했듯 AlarmManager에 설정한 알람은 핸드폰 재부팅 시 사라지기 때문에 어딘가에 설정한 알람 정보를 저장할 필요가 있다. 그래서 Room DB를 써서 저장하는 부분도 같이 구현한다.
hilt를 사용했고 data, domain 같은 패키지로 나눴으니 참고한다. 의존성 설정은 생략한다.
먼저 Room DB에 데이터를 저장할 때 사용할 엔티티부터 정의한다.
package com.example.regacyviewexample.domain.entity

import android.os.Parcelable
import kotlinx.parcelize.Parcelize
import java.time.LocalDateTime

@Parcelize
data class Alarm(
    val id: Long = 0L, // AlarmManager용 ID
    val title: String, // 알람 제목
    val description: String = "", // 알람 설명
    val dateTime: LocalDateTime, // 알람 설정 시간
    val isEnabled: Boolean = true, // 알람 활성화 상태
    val isRepeating: Boolean = false, // 반복 여부
    val repeatDays: Set<Int> = emptySet(), // 반복 요일 (1=월요일, 7=일요일)
    val createdAt: LocalDateTime = LocalDateTime.now() // 생성 시간
) : Parcelable {

    companion object {
        // 요일 상수
        const val MONDAY = 1
        const val TUESDAY = 2
        const val WEDNESDAY = 3
        const val THURSDAY = 4
        const val FRIDAY = 5
        const val SATURDAY = 6
        const val SUNDAY = 7
    }
}
그리고 data 안의 local 패키지에 엔티티를 만들었다.
package com.example.regacyviewexample.data.local

import androidx.room.Entity
import androidx.room.PrimaryKey
import androidx.room.TypeConverters
import com.example.regacyviewexample.domain.entity.Alarm
import java.time.LocalDateTime

@Entity(tableName = "alarms")
@TypeConverters(LocalTimeConverters::class)
data class AlarmEntity(
    @PrimaryKey(autoGenerate = true)
    val id: Long = 0L,
    val title: String,
    val description: String,
    val dateTime: LocalDateTime,
    val isEnabled: Boolean,
    val isRepeating: Boolean,
    val repeatDays: String, // Set<Int>를 JSON 문자열로 바꿔서 저장
    val createdAt: LocalDateTime
) {

    fun toDomain(): Alarm {
        val daysSet = if (repeatDays.isNotEmpty() && repeatDays != "[]") {
            repeatDays.removeSurrounding("[", "]")
                .split(",")
                .mapNotNull { it.trim().toIntOrNull() }
                .toSet()
        } else {
            emptySet()
        }

        return Alarm(
            id = id,
            title = title,
            description = description,
            dateTime = dateTime,
            isEnabled = isEnabled,
            isRepeating = isRepeating,
            repeatDays = daysSet,
            createdAt = createdAt
        )
    }

    companion object {
        fun fromDomain(alarm: Alarm): AlarmEntity {
            val daysString = alarm.repeatDays.toString()

            return AlarmEntity(
                id = alarm.id,
                title = alarm.title,
                description = alarm.description,
                dateTime = alarm.dateTime,
                isEnabled = alarm.isEnabled,
                isRepeating = alarm.isRepeating,
                repeatDays = daysString,
                createdAt = alarm.createdAt
            )
        }
    }
}
이어서 local 패키지에 있어야 하는 다른 파일들을 만든다.
package com.example.regacyviewexample.data.local

import androidx.room.*
import kotlinx.coroutines.flow.Flow

@Dao
interface AlarmDao {

    @Query("SELECT * FROM alarms ORDER BY dateTime ASC")
    fun getAllAlarms(): Flow<List<AlarmEntity>>

    @Query("SELECT * FROM alarms WHERE id = :id")
    suspend fun getAlarmById(id: Long): AlarmEntity?

    @Insert(onConflict = OnConflictStrategy.REPLACE)
    suspend fun insertAlarm(alarm: AlarmEntity): Long

    @Update
    suspend fun updateAlarm(alarm: AlarmEntity)

    @Delete
    suspend fun deleteAlarm(alarm: AlarmEntity)

    @Query("UPDATE alarms SET isEnabled = :isEnabled WHERE id = :id")
    suspend fun toggleAlarm(id: Long, isEnabled: Boolean)
}
package com.example.regacyviewexample.data.local
import androidx.room.Database
import androidx.room.RoomDatabase
import androidx.room.TypeConverters
@Database(
entities = [AlarmEntity::class],
version = 1,
exportSchema = false
)
@TypeConverters(LocalTimeConverters::class)
abstract class AlarmDatabase : RoomDatabase() {
abstract fun alarmDao(): AlarmDao
companion object {
const val DATABASE_NAME = "alarm_database"
}
}package com.example.regacyviewexample.data.local
import androidx.room.TypeConverter
import java.time.LocalDateTime
import java.time.format.DateTimeFormatter
class LocalTimeConverters {
private val formatter = DateTimeFormatter.ISO_LOCAL_DATE_TIME
@TypeConverter
fun fromLocalDateTime(dateTime: LocalDateTime?): String? {
return dateTime?.format(formatter)
}
@TypeConverter
fun toLocalDateTime(dateTimeString: String?): LocalDateTime? {
return dateTimeString?.let {
LocalDateTime.parse(it, formatter)
}
}
}
LocalTimeConverters는 Room에 LocalDateTime 값을 저장하려고 만든 컨버터다. Room에 LocalDateTime을 직접 저장할 수 없어서 위와 같이 LocalDateTime을 String으로 바꾸고 Room에서 가져올 땐 String으로 받아온 값을 LocalDateTime으로 변환한다.
참고로 ISO_LOCAL_DATE_TIME은 "2025-01-01T01:23:45.6" 형태로 표현되는 시간이다.
그리고 AlarmManager의 함수를 사용해서 알람 설정 / 취소, 반복 알람을 설정하는 함수를 가진 클래스를 구현한다.
import android.app.AlarmManager
import android.app.PendingIntent
import android.content.Context
import android.content.Intent
import android.os.Build
import com.example.regacyviewexample.data.receiver.AlarmReceiver
import com.example.regacyviewexample.domain.entity.Alarm
import dagger.hilt.android.qualifiers.ApplicationContext
import java.time.LocalDateTime
import java.time.ZoneId
import javax.inject.Inject
import javax.inject.Singleton

@Singleton
class AlarmManagerHelper @Inject constructor(
    @ApplicationContext private val context: Context
) {

    private val alarmManager = context.getSystemService(Context.ALARM_SERVICE) as AlarmManager

    /**
     * 알람 설정
     */
    fun setAlarm(alarm: Alarm) {
        val intent = Intent(context, AlarmReceiver::class.java).apply {
            putExtra("alarm_id", alarm.id)
            putExtra("alarm_title", alarm.title)
            putExtra("alarm_description", alarm.description)
        }

        val pendingIntent = PendingIntent.getBroadcast(
            context,
            alarm.id.toInt(),
            intent,
            PendingIntent.FLAG_UPDATE_CURRENT or PendingIntent.FLAG_IMMUTABLE
        )

        val triggerTime = alarm.dateTime
            .atZone(ZoneId.systemDefault())
            .toInstant()
            .toEpochMilli()

        // api 레벨 별 알람 설정
        when {
            Build.VERSION.SDK_INT >= Build.VERSION_CODES.M -> {
                // 23 이상
                alarmManager.setExactAndAllowWhileIdle(
                    AlarmManager.RTC_WAKEUP,
                    triggerTime,
                    pendingIntent
                )
            }
            Build.VERSION.SDK_INT >= Build.VERSION_CODES.KITKAT -> {
                // 19~22
                alarmManager.setExact(
                    AlarmManager.RTC_WAKEUP,
                    triggerTime,
                    pendingIntent
                )
            }
            else -> {
                // 18 이하
                alarmManager.set(
                    AlarmManager.RTC_WAKEUP,
                    triggerTime,
                    pendingIntent
                )
            }
        }

        // 반복 알람이면 다음 알람도 설정
        if (alarm.isRepeating && alarm.repeatDays.isNotEmpty()) {
            setNextRepeatingAlarm(alarm)
        }
    }

    /**
     * 알람 취소
     */
    fun cancelAlarm(alarmId: Long) {
        val intent = Intent(context, AlarmReceiver::class.java)
        val pendingIntent = PendingIntent.getBroadcast(
            context,
            alarmId.toInt(),
            intent,
            PendingIntent.FLAG_UPDATE_CURRENT or PendingIntent.FLAG_IMMUTABLE
        )

        alarmManager.cancel(pendingIntent)
        pendingIntent.cancel()
    }

    /**
     * 다음 반복 알람 설정
     */
    private fun setNextRepeatingAlarm(alarm: Alarm) {
        val now = LocalDateTime.now()
        var nextAlarmTime = alarm.dateTime

        // 현재 시간보다 전이면 다음 반복 시간으로 설정
        while (nextAlarmTime.isBefore(now)) {
            nextAlarmTime = nextAlarmTime.plusDays(1)

            // 설정된 요일에 해당하는지 확인
            val dayOfWeek = nextAlarmTime.dayOfWeek.value // 1=월요일, 7=일요일
            if (alarm.repeatDays.contains(dayOfWeek)) {
                break
            }
        }

        // 다음 알람으로 업데이트해서 재설정
        val nextAlarm = alarm.copy(dateTime = nextAlarmTime)
        setAlarm(nextAlarm)
    }

    /**
     * 정확한 알람 설정 권한 확인 (api 31+)
     */
    fun canScheduleExactAlarms(): Boolean {
        return if (Build.VERSION.SDK_INT >= Build.VERSION_CODES.S) {
            alarmManager.canScheduleExactAlarms()
        } else {
            true
        }
    }
}
그리고 알람 브로드캐스트를 처리할 클래스를 만든다. 위의 인텐트에서 putXXX()로 넣은 값을 받기 위해 getXXX()도 동일하게 설정해야 한다.
import android.app.NotificationChannel
import android.app.NotificationManager
import android.app.PendingIntent
import android.content.BroadcastReceiver
import android.content.Context
import android.content.Intent
import android.content.pm.PackageManager
import android.os.Build
import androidx.core.app.ActivityCompat
import androidx.core.app.NotificationCompat
import androidx.core.app.NotificationManagerCompat
import com.example.regacyviewexample.R
import com.example.regacyviewexample.presentation.MainActivity
import com.example.regacyviewexample.presentation.alarm.AlarmListActivity

class AlarmReceiver : BroadcastReceiver() {

    companion object {
        private const val CHANNEL_ID = "alarm_channel"
        private const val NOTIFICATION_ID = 1001
    }

    override fun onReceive(context: Context, intent: Intent) {
        val alarmId = intent.getLongExtra("alarm_id", -1L)
        val title = intent.getStringExtra("alarm_title") ?: "알람"
        val description = intent.getStringExtra("alarm_description") ?: ""

        createNotificationChannel(context)
        showNotification(context, alarmId, title, description)
    }

    private fun createNotificationChannel(context: Context) {
        val name = "알람 알림"
        val descriptionText = "알람 시간이 되면 표시되는 알림입니다"
        val importance = NotificationManager.IMPORTANCE_HIGH
        val channel = NotificationChannel(CHANNEL_ID, name, importance).apply {
            description = descriptionText
        }

        val notificationManager: NotificationManager =
            context.getSystemService(Context.NOTIFICATION_SERVICE) as NotificationManager
        notificationManager.createNotificationChannel(channel)
    }

    private fun showNotification(
        context: Context,
        alarmId: Long,
        title: String,
        description: String
    ) {
        // 안드 13 이상에서 알림 권한 체크
        if (Build.VERSION.SDK_INT >= Build.VERSION_CODES.TIRAMISU) {
            if (ActivityCompat.checkSelfPermission(
                    context,
                    android.Manifest.permission.POST_NOTIFICATIONS
                ) != PackageManager.PERMISSION_GRANTED
            ) {
                // 권한 없으면 알림 표시 x
                return
            }
        }

        // 알림 클릭 시 실행될 인텐트
        val intent = Intent(context, AlarmListActivity::class.java).apply {
            flags = Intent.FLAG_ACTIVITY_NEW_TASK or Intent.FLAG_ACTIVITY_CLEAR_TASK
        }

        val pendingIntent = PendingIntent.getActivity(
            context,
            alarmId.toInt(),
            intent,
            PendingIntent.FLAG_UPDATE_CURRENT or PendingIntent.FLAG_IMMUTABLE
        )

        val builder = NotificationCompat.Builder(context, CHANNEL_ID)
            .setSmallIcon(R.drawable.ic_alarm)
            .setContentTitle(title)
            .setContentText(description)
            .setPriority(NotificationCompat.PRIORITY_HIGH)
            .setContentIntent(pendingIntent)
            .setAutoCancel(true)
            .setDefaults(NotificationCompat.DEFAULT_ALL)

        // 알림 표시
        with(NotificationManagerCompat.from(context)) {
            notify(NOTIFICATION_ID, builder.build())
        }
    }
}
그리고 매니페스트에 필요한 권한들과 위에서 정의한 리시버를 등록해야 한다.
<uses-permission android:name="android.permission.WAKE_LOCK" />
<uses-permission android:name="android.permission.RECEIVE_BOOT_COMPLETED" />
<uses-permission android:name="android.permission.VIBRATE" />
<uses-permission android:name="android.permission.USE_EXACT_ALARM" />
<uses-permission android:name="android.permission.SCHEDULE_EXACT_ALARM" />
<uses-permission android:name="android.permission.POST_NOTIFICATIONS" />

...

	<receiver
            android:name=".data.receiver.AlarmReceiver"
            android:enabled="true"
            android:exported="false" />
    </application>
이제 repository에 인터페이스를 정의한다.
import com.example.regacyviewexample.domain.entity.Alarm
import kotlinx.coroutines.flow.Flow

interface AlarmRepository {

    fun getAllAlarms(): Flow<List<Alarm>>

    suspend fun getAlarmById(id: Long): Alarm?

    suspend fun saveAlarm(alarm: Alarm): Long

    suspend fun updateAlarm(alarm: Alarm)

    suspend fun deleteAlarm(alarm: Alarm)

    suspend fun toggleAlarm(id: Long, isEnabled: Boolean)
}
impl과 모듈 구현은 적절하게 해 준다.
import com.example.regacyviewexample.data.local.AlarmDao
import com.example.regacyviewexample.data.local.AlarmEntity
import com.example.regacyviewexample.data.manager.AlarmManagerHelper
import com.example.regacyviewexample.domain.entity.Alarm
import com.example.regacyviewexample.domain.repository.AlarmRepository
import kotlinx.coroutines.flow.Flow
import kotlinx.coroutines.flow.map
import javax.inject.Inject
import javax.inject.Singleton

@Singleton
class AlarmRepositoryImpl @Inject constructor(
    private val alarmDao: AlarmDao,
    private val alarmManagerHelper: AlarmManagerHelper
) : AlarmRepository {

    override fun getAllAlarms(): Flow<List<Alarm>> {
        return alarmDao.getAllAlarms().map { entities ->
            entities.map { it.toDomain() }
        }
    }

    override suspend fun getAlarmById(id: Long): Alarm? {
        return alarmDao.getAlarmById(id)?.toDomain()
    }

    override suspend fun saveAlarm(alarm: Alarm): Long {
        val entity = AlarmEntity.fromDomain(alarm)
        val savedId = alarmDao.insertAlarm(entity)

        // 알람이 활성화 상태면 알람 등록
        if (alarm.isEnabled) {
            val savedAlarm = alarm.copy(id = savedId)
            alarmManagerHelper.setAlarm(savedAlarm)
        }

        return savedId
    }

    override suspend fun updateAlarm(alarm: Alarm) {
        val entity = AlarmEntity.fromDomain(alarm)
        alarmDao.updateAlarm(entity)

        // 기존 알람 취소하고 새로 등록
        alarmManagerHelper.cancelAlarm(alarm.id)
        if (alarm.isEnabled) {
            alarmManagerHelper.setAlarm(alarm)
        }
    }

    override suspend fun deleteAlarm(alarm: Alarm) {
        val entity = AlarmEntity.fromDomain(alarm)
        alarmDao.deleteAlarm(entity)

        // 알람도 같이 취소
        alarmManagerHelper.cancelAlarm(alarm.id)
    }

    override suspend fun toggleAlarm(id: Long, isEnabled: Boolean) {
        alarmDao.toggleAlarm(id, isEnabled)

        if (isEnabled) {
            // 알람 활성화 - 알람 등록
            val alarm = getAlarmById(id)
            alarm?.let { alarmManagerHelper.setAlarm(it) }
        } else {
            // 알람 비활성화 - 알람 취소
            alarmManagerHelper.cancelAlarm(id)
        }
    }
}
import com.example.regacyviewexample.data.repository.AlarmRepositoryImpl
import com.example.regacyviewexample.domain.repository.AlarmRepository
import dagger.Binds
import dagger.Module
import dagger.hilt.InstallIn
import dagger.hilt.components.SingletonComponent
import javax.inject.Singleton
@Module
@InstallIn(SingletonComponent::class)
abstract class RepositoryModule {
@Binds
@Singleton
abstract fun bindAlarmRepository(impl: AlarmRepositoryImpl): AlarmRepository
}
이제 뷰모델을 만든다.
import androidx.lifecycle.ViewModel
import androidx.lifecycle.viewModelScope
import com.example.regacyviewexample.domain.entity.Alarm
import com.example.regacyviewexample.domain.usecase.DeleteAlarmUseCase
import com.example.regacyviewexample.domain.usecase.GetAllAlarmsUseCase
import com.example.regacyviewexample.domain.usecase.ToggleAlarmUseCase
import dagger.hilt.android.lifecycle.HiltViewModel
import kotlinx.coroutines.flow.MutableStateFlow
import kotlinx.coroutines.flow.StateFlow
import kotlinx.coroutines.flow.asStateFlow
import kotlinx.coroutines.launch
import javax.inject.Inject

@HiltViewModel
class AlarmListViewModel @Inject constructor(
    private val getAllAlarmsUseCase: GetAllAlarmsUseCase,
    private val toggleAlarmUseCase: ToggleAlarmUseCase,
    private val deleteAlarmUseCase: DeleteAlarmUseCase
) : ViewModel() {

    private val _alarms = MutableStateFlow<List<Alarm>>(emptyList())
    val alarms: StateFlow<List<Alarm>> = _alarms.asStateFlow()

    init {
        loadAlarms()
    }

    private fun loadAlarms() = viewModelScope.launch {
        getAllAlarmsUseCase().collect { alarmList ->
            _alarms.value = alarmList
        }
    }

    fun toggleAlarm(id: Long, isEnabled: Boolean) = viewModelScope.launch {
        try {
            toggleAlarmUseCase(id, isEnabled)
        } catch (e: Exception) {
            // 에러 처리
        }
    }

    fun deleteAlarm(alarm: Alarm) = viewModelScope.launch {
        try {
            deleteAlarmUseCase(alarm)
        } catch (e: Exception) {
            // 에러 처리
        }
    }
}
import androidx.lifecycle.ViewModel
import androidx.lifecycle.viewModelScope
import com.example.regacyviewexample.domain.entity.Alarm
import com.example.regacyviewexample.domain.usecase.SaveAlarmUseCase
import dagger.hilt.android.lifecycle.HiltViewModel
import kotlinx.coroutines.flow.MutableStateFlow
import kotlinx.coroutines.flow.StateFlow
import kotlinx.coroutines.flow.asStateFlow
import kotlinx.coroutines.launch
import javax.inject.Inject
@HiltViewModel
class AlarmCreateViewModel @Inject constructor(
private val saveAlarmUseCase: SaveAlarmUseCase
) : ViewModel() {
private val _saveResult = MutableStateFlow<SaveResult>(SaveResult.Idle)
val saveResult: StateFlow<SaveResult> = _saveResult.asStateFlow()
fun saveAlarm(alarm: Alarm) = viewModelScope.launch {
try {
val savedId = saveAlarmUseCase(alarm)
_saveResult.value = SaveResult.Success(savedId)
} catch (e: Exception) {
_saveResult.value = SaveResult.Error(e.message ?: "알 수 없는 오류 발생")
}
}
sealed class SaveResult {
object Idle : SaveResult()
data class Success(val alarmId: Long) : SaveResult()
data class Error(val message: String) : SaveResult()
}
}
이제 액티비티를 만든다. UI는 AI에 말해서 대충 만들었다.
아이콘은 material icon 사이트에서 검색해서 svg로 다운받고 프로젝트에 임포트했다.
import android.os.Build
import android.os.Bundle
import android.widget.CheckBox
import android.widget.Toast
import androidx.activity.enableEdgeToEdge
import androidx.activity.viewModels
import androidx.appcompat.app.AppCompatActivity
import androidx.core.view.ViewCompat
import androidx.core.view.WindowInsetsCompat
import androidx.lifecycle.lifecycleScope
import com.example.regacyviewexample.R
import com.example.regacyviewexample.databinding.ActivityAlarmCreateBinding
import com.example.regacyviewexample.domain.entity.Alarm
import com.example.regacyviewexample.presentation.alarm.viewmodel.AlarmCreateViewModel
import dagger.hilt.android.AndroidEntryPoint
import kotlinx.coroutines.launch
import java.time.LocalDateTime

@AndroidEntryPoint
class AlarmCreateActivity : AppCompatActivity() {

    private lateinit var binding: ActivityAlarmCreateBinding

    private val dayCheckBoxes = mutableMapOf<Int, CheckBox>()

    private val alarmCreateViewModel: AlarmCreateViewModel by viewModels()

    override fun onCreate(savedInstanceState: Bundle?) {
        super.onCreate(savedInstanceState)
        enableEdgeToEdge()
        binding = ActivityAlarmCreateBinding.inflate(layoutInflater)
        setContentView(binding.root)
        ViewCompat.setOnApplyWindowInsetsListener(findViewById(R.id.alarm_create_main)) { v, insets ->
            val systemBars = insets.getInsets(WindowInsetsCompat.Type.systemBars())
            v.setPadding(systemBars.left, systemBars.top, systemBars.right, systemBars.bottom)
            insets
        }

        setupToolbar()
        setupViews()
        setupCheckBoxes()
        observeViewModel()
    }

    private fun setupToolbar() {
        setSupportActionBar(binding.toolbar)
        supportActionBar?.apply {
            setDisplayHomeAsUpEnabled(true)
            setDisplayShowHomeEnabled(true)
            title = "알람 설정"
        }

        binding.toolbar.setNavigationOnClickListener {
            finish()
        }
    }

    private fun setupViews() {
        binding.switchRepeat.setOnCheckedChangeListener { _, isChecked ->
            binding.layoutRepeatDays.visibility = if (isChecked) {
                android.view.View.VISIBLE
            } else {
                android.view.View.GONE
            }
        }

        binding.buttonSave.setOnClickListener {
            saveAlarm()
        }
    }

    private fun setupCheckBoxes() {
        with(binding) {
            dayCheckBoxes[Alarm.MONDAY] = checkBoxMonday
            dayCheckBoxes[Alarm.TUESDAY] = checkBoxTuesday
            dayCheckBoxes[Alarm.WEDNESDAY] = checkBoxWednesday
            dayCheckBoxes[Alarm.THURSDAY] = checkBoxThursday
            dayCheckBoxes[Alarm.FRIDAY] = checkBoxFriday
            dayCheckBoxes[Alarm.SATURDAY] = checkBoxSaturday
            dayCheckBoxes[Alarm.SUNDAY] = checkBoxSunday
        }
    }

    private fun saveAlarm() {
        val title = binding.editTextTitle.text?.toString()?.trim()
        if (title.isNullOrEmpty()) {
            Toast.makeText(this, "알람 제목을 입력하세요", Toast.LENGTH_SHORT).show()
            return
        }

        val description = binding.editTextDescription.text?.toString()?.trim() ?: ""

        // 시간 정보 가져오기
        val hour: Int
        val minute: Int

        if (Build.VERSION.SDK_INT >= Build.VERSION_CODES.M) {
            hour = binding.timePicker.hour
            minute = binding.timePicker.minute
        } else {
            @Suppress("DEPRECATION")
            hour = binding.timePicker.currentHour
            @Suppress("DEPRECATION")
            minute = binding.timePicker.currentMinute
        }

        // 선택된 날짜의 해당 시간으로 설정 (현재는 오늘 기준)
        val alarmDateTime = LocalDateTime.now()
            .withHour(hour)
            .withMinute(minute)
            .withSecond(0)
            .withNano(0)
            .let {
                // 만약 현재 시간보다 이전이면 다음날로 설정
                if (it.isBefore(LocalDateTime.now())) {
                    it.plusDays(1)
                } else {
                    it
                }
            }

        val isRepeating = binding.switchRepeat.isChecked
        val repeatDays = if (isRepeating) {
            dayCheckBoxes.filter { it.value.isChecked }.keys.toSet()
        } else {
            emptySet()
        }

        // 반복 알람인데 요일을 선택하지 않은 경우
        if (isRepeating && repeatDays.isEmpty()) {
            Toast.makeText(this, "반복할 요일을 선택하세요", Toast.LENGTH_SHORT).show()
            return
        }

        val alarm = Alarm(
            title = title,
            description = description,
            dateTime = alarmDateTime,
            isEnabled = true,
            isRepeating = isRepeating,
            repeatDays = repeatDays
        )

        alarmCreateViewModel.saveAlarm(alarm)
    }

    private fun observeViewModel() {
        lifecycleScope.launch {
            alarmCreateViewModel.saveResult.collect { result ->
                when (result) {
                    is AlarmCreateViewModel.SaveResult.Success -> {
                        Toast.makeText(this@AlarmCreateActivity, "알람이 저장되었습니다", Toast.LENGTH_SHORT).show()
                        finish()
                    }
                    is AlarmCreateViewModel.SaveResult.Error -> {
                        Toast.makeText(this@AlarmCreateActivity, "알람 저장에 실패했습니다: ${result.message}", Toast.LENGTH_SHORT).show()
                    }
                    is AlarmCreateViewModel.SaveResult.Idle -> {
                        // 초기 상태
                    }
                }
            }
        }
    }

}
<?xml version="1.0" encoding="utf-8"?>
<androidx.coordinatorlayout.widget.CoordinatorLayout xmlns:android="http://schemas.android.com/apk/res/android"
xmlns:app="http://schemas.android.com/apk/res-auto"
xmlns:tools="http://schemas.android.com/tools"
android:layout_width="match_parent"
android:layout_height="match_parent"
android:id="@+id/alarm_create_main"
tools:context=".presentation.alarm.AlarmCreateActivity">
<com.google.android.material.appbar.AppBarLayout
android:layout_width="match_parent"
android:layout_height="wrap_content">
<androidx.appcompat.widget.Toolbar
android:id="@+id/toolbar"
android:layout_width="match_parent"
android:layout_height="?attr/actionBarSize"
android:background="?attr/colorPrimary"
app:navigationIcon="@drawable/ic_arrow_back"
app:title="알람 설정"
app:titleTextColor="@android:color/white" />
</com.google.android.material.appbar.AppBarLayout>
<androidx.core.widget.NestedScrollView
android:layout_width="match_parent"
android:layout_height="match_parent"
android:layout_marginTop="?attr/actionBarSize"
android:fillViewport="true">
<LinearLayout
android:layout_width="match_parent"
android:layout_height="wrap_content"
android:orientation="vertical"
android:padding="16dp">
<com.google.android.material.card.MaterialCardView
android:layout_width="match_parent"
android:layout_height="wrap_content"
android:layout_marginBottom="16dp"
app:cardCornerRadius="8dp"
app:cardElevation="2dp">
<LinearLayout
android:layout_width="match_parent"
android:layout_height="wrap_content"
android:orientation="vertical"
android:padding="16dp">
<TextView
android:layout_width="wrap_content"
android:layout_height="wrap_content"
android:text="시간"
android:textSize="16sp"
android:textStyle="bold" />
<TimePicker
android:id="@+id/timePicker"
android:layout_width="wrap_content"
android:layout_height="wrap_content"
android:layout_gravity="center_horizontal"
android:layout_marginTop="8dp"
android:timePickerMode="spinner" />
</LinearLayout>
</com.google.android.material.card.MaterialCardView>
<com.google.android.material.textfield.TextInputLayout
android:layout_width="match_parent"
android:layout_height="wrap_content"
android:layout_marginBottom="16dp"
app:boxStrokeColor="@color/colorPrimary"
app:hintTextColor="@color/colorPrimary">
<com.google.android.material.textfield.TextInputEditText
android:id="@+id/editTextTitle"
android:layout_width="match_parent"
android:layout_height="wrap_content"
android:hint="알람 제목"
android:inputType="text"
android:maxLines="1" />
</com.google.android.material.textfield.TextInputLayout>
<com.google.android.material.textfield.TextInputLayout
android:layout_width="match_parent"
android:layout_height="wrap_content"
android:layout_marginBottom="16dp"
app:boxStrokeColor="@color/colorPrimary"
app:hintTextColor="@color/colorPrimary">
<com.google.android.material.textfield.TextInputEditText
android:id="@+id/editTextDescription"
android:layout_width="match_parent"
android:layout_height="wrap_content"
android:hint="알람 설명 (선택사항)"
android:inputType="textMultiLine"
android:maxLines="3" />
</com.google.android.material.textfield.TextInputLayout>
<com.google.android.material.card.MaterialCardView
android:layout_width="match_parent"
android:layout_height="wrap_content"
android:layout_marginBottom="16dp"
app:cardCornerRadius="8dp"
app:cardElevation="2dp">
<LinearLayout
android:layout_width="match_parent"
android:layout_height="wrap_content"
android:orientation="vertical"
android:padding="16dp">
<LinearLayout
android:layout_width="match_parent"
android:layout_height="wrap_content"
android:orientation="horizontal">
<TextView
android:layout_width="0dp"
android:layout_height="wrap_content"
android:layout_weight="1"
android:text="반복"
android:textSize="16sp"
android:textStyle="bold" />
<androidx.appcompat.widget.SwitchCompat
android:id="@+id/switchRepeat"
android:layout_width="wrap_content"
android:layout_height="wrap_content" />
</LinearLayout>
<LinearLayout
android:id="@+id/layoutRepeatDays"
android:layout_width="match_parent"
android:layout_height="wrap_content"
android:layout_marginTop="16dp"
android:orientation="horizontal"
android:visibility="gone">
<CheckBox
android:id="@+id/checkBoxMonday"
android:layout_width="0dp"
android:layout_height="wrap_content"
android:layout_weight="1"
android:gravity="center"
android:text="월"
android:textSize="12sp" />
<CheckBox
android:id="@+id/checkBoxTuesday"
android:layout_width="0dp"
android:layout_height="wrap_content"
android:layout_weight="1"
android:gravity="center"
android:text="화"
android:textSize="12sp" />
<CheckBox
android:id="@+id/checkBoxWednesday"
android:layout_width="0dp"
android:layout_height="wrap_content"
android:layout_weight="1"
android:gravity="center"
android:text="수"
android:textSize="12sp" />
<CheckBox
android:id="@+id/checkBoxThursday"
android:layout_width="0dp"
android:layout_height="wrap_content"
android:layout_weight="1"
android:gravity="center"
android:text="목"
android:textSize="12sp" />
<CheckBox
android:id="@+id/checkBoxFriday"
android:layout_width="0dp"
android:layout_height="wrap_content"
android:layout_weight="1"
android:gravity="center"
android:text="금"
android:textSize="12sp" />
<CheckBox
android:id="@+id/checkBoxSaturday"
android:layout_width="0dp"
android:layout_height="wrap_content"
android:layout_weight="1"
android:gravity="center"
android:text="토"
android:textSize="12sp" />
<CheckBox
android:id="@+id/checkBoxSunday"
android:layout_width="0dp"
android:layout_height="wrap_content"
android:layout_weight="1"
android:gravity="center"
android:text="일"
android:textSize="12sp" />
</LinearLayout>
</LinearLayout>
</com.google.android.material.card.MaterialCardView>
<Button
android:id="@+id/buttonSave"
android:layout_width="match_parent"
android:layout_height="wrap_content"
android:layout_marginTop="24dp"
android:padding="16dp"
android:text="알람 저장"
android:textColor="@android:color/white"
android:textSize="16sp"
android:textStyle="bold" />
</LinearLayout>
</androidx.core.widget.NestedScrollView>
</androidx.coordinatorlayout.widget.CoordinatorLayout>import android.Manifest
import android.content.Intent
import android.content.pm.PackageManager
import android.os.Build
import android.os.Bundle
import androidx.activity.enableEdgeToEdge
import androidx.activity.result.contract.ActivityResultContracts
import androidx.activity.viewModels
import androidx.appcompat.app.AppCompatActivity
import androidx.core.content.ContextCompat
import androidx.core.view.ViewCompat
import androidx.core.view.WindowInsetsCompat
import androidx.lifecycle.lifecycleScope
import androidx.recyclerview.widget.LinearLayoutManager
import com.example.regacyviewexample.R
import com.example.regacyviewexample.databinding.ActivityAlarmListBinding
import com.example.regacyviewexample.presentation.alarm.adapter.AlarmAdapter
import com.example.regacyviewexample.presentation.alarm.viewmodel.AlarmListViewModel
import dagger.hilt.android.AndroidEntryPoint
import kotlinx.coroutines.launch
@AndroidEntryPoint
class AlarmListActivity : AppCompatActivity() {
private lateinit var binding: ActivityAlarmListBinding
private lateinit var alarmAdapter: AlarmAdapter
private val alarmListViewModel: AlarmListViewModel by viewModels()
// 알림 권한 요청 런처
private val notificationPermissionLauncher = registerForActivityResult(
ActivityResultContracts.RequestPermission()
) { isGranted ->
if (!isGranted) {
// 권한 거부 시 로직
}
}
override fun onCreate(savedInstanceState: Bundle?) {
super.onCreate(savedInstanceState)
enableEdgeToEdge()
binding = ActivityAlarmListBinding.inflate(layoutInflater)
setContentView(binding.root)
ViewCompat.setOnApplyWindowInsetsListener(findViewById(R.id.alarm_list_main)) { v, insets ->
val systemBars = insets.getInsets(WindowInsetsCompat.Type.systemBars())
v.setPadding(systemBars.left, systemBars.top, systemBars.right, systemBars.bottom)
insets
}
checkNotificationPermission()
setupToolbar()
setupRecyclerView()
setupFab()
observeViewModel()
}
private fun checkNotificationPermission() {
if (Build.VERSION.SDK_INT >= Build.VERSION_CODES.TIRAMISU) {
if (ContextCompat.checkSelfPermission(
this,
Manifest.permission.POST_NOTIFICATIONS
) != PackageManager.PERMISSION_GRANTED
) {
notificationPermissionLauncher.launch(Manifest.permission.POST_NOTIFICATIONS)
}
}
}
private fun setupToolbar() {
setSupportActionBar(binding.toolbar)
supportActionBar?.title = "알람"
}
private fun setupRecyclerView() {
alarmAdapter = AlarmAdapter(
onToggleAlarm = { alarm, isEnabled ->
alarmListViewModel.toggleAlarm(alarm.id, isEnabled)
},
onDeleteAlarm = { alarm ->
alarmListViewModel.deleteAlarm(alarm)
}
)
binding.recyclerViewAlarms.apply {
layoutManager = LinearLayoutManager(this@AlarmListActivity)
adapter = alarmAdapter
}
}
private fun setupFab() {
binding.fabAddAlarm.setOnClickListener {
startActivity(
Intent(this, AlarmCreateActivity::class.java)
)
}
}
private fun observeViewModel() {
lifecycleScope.launch {
alarmListViewModel.alarms.collect { alarms ->
alarmAdapter.submitList(alarms)
if (alarms.isEmpty()) {
binding.textViewEmpty.visibility = android.view.View.VISIBLE
binding.recyclerViewAlarms.visibility = android.view.View.GONE
} else {
binding.textViewEmpty.visibility = android.view.View.GONE
binding.recyclerViewAlarms.visibility = android.view.View.VISIBLE
}
}
}
}
}<?xml version="1.0" encoding="utf-8"?>
<androidx.coordinatorlayout.widget.CoordinatorLayout xmlns:android="http://schemas.android.com/apk/res/android"
xmlns:app="http://schemas.android.com/apk/res-auto"
xmlns:tools="http://schemas.android.com/tools"
android:layout_width="match_parent"
android:layout_height="match_parent"
android:id="@+id/alarm_list_main"
tools:context=".presentation.alarm.AlarmListActivity">
<com.google.android.material.appbar.AppBarLayout
android:layout_width="match_parent"
android:layout_height="wrap_content">
<androidx.appcompat.widget.Toolbar
android:id="@+id/toolbar"
android:layout_width="match_parent"
android:layout_height="?attr/actionBarSize"
android:background="?attr/colorPrimary"
app:title="알람"
app:titleTextColor="@android:color/white" />
</com.google.android.material.appbar.AppBarLayout>
<androidx.recyclerview.widget.RecyclerView
android:id="@+id/recyclerViewAlarms"
android:layout_width="match_parent"
android:layout_height="match_parent"
android:layout_marginTop="?attr/actionBarSize"
android:padding="16dp"
app:layoutManager="androidx.recyclerview.widget.LinearLayoutManager"
tools:listitem="@layout/item_alarm" />
<TextView
android:id="@+id/textViewEmpty"
android:layout_width="wrap_content"
android:layout_height="wrap_content"
android:layout_gravity="center"
android:text="등록된 알람이 없습니다"
android:textColor="@android:color/darker_gray"
android:textSize="16sp"
android:visibility="gone" />
<com.google.android.material.floatingactionbutton.FloatingActionButton
android:id="@+id/fabAddAlarm"
android:layout_width="wrap_content"
android:layout_height="wrap_content"
android:layout_gravity="bottom|end"
android:layout_margin="16dp"
android:src="@drawable/ic_add"
app:tint="@android:color/white" />
</androidx.coordinatorlayout.widget.CoordinatorLayout>
마지막으로 생성된 알람을 표시할 리사이클러뷰 어댑터와 아이템 XML을 만든다.
아이템 이름은 item_alarm.xml이다.
import android.view.LayoutInflater
import android.view.ViewGroup
import androidx.recyclerview.widget.DiffUtil
import androidx.recyclerview.widget.ListAdapter
import androidx.recyclerview.widget.RecyclerView
import com.example.regacyviewexample.databinding.ItemAlarmBinding
import com.example.regacyviewexample.domain.entity.Alarm
import java.time.format.DateTimeFormatter

class AlarmAdapter(
    private val onToggleAlarm: (Alarm, Boolean) -> Unit,
    private val onDeleteAlarm: (Alarm) -> Unit
) : ListAdapter<Alarm, AlarmAdapter.AlarmViewHolder>(AlarmDiffCallback()) {

    override fun onCreateViewHolder(parent: ViewGroup, viewType: Int): AlarmViewHolder {
        val binding = ItemAlarmBinding.inflate(
            LayoutInflater.from(parent.context),
            parent,
            false
        )

        return AlarmViewHolder(binding, onToggleAlarm, onDeleteAlarm)
    }

    override fun onBindViewHolder(holder: AlarmViewHolder, position: Int) =
        holder.bind(getItem(position))

    class AlarmViewHolder(
        private val binding: ItemAlarmBinding,
        private val onToggleAlarm: (Alarm, Boolean) -> Unit,
        private val onDeleteAlarm: (Alarm) -> Unit
    ) : RecyclerView.ViewHolder(binding.root) {

        fun bind(alarm: Alarm) {
            with(binding) {
                // 시간 표시
                val timeFormatter = DateTimeFormatter.ofPattern("HH:mm")
                textViewTime.text = alarm.dateTime.format(timeFormatter)

                // 제목
                textViewTitle.text = alarm.title

                // 설명
                if (alarm.description.isNotEmpty()) {
                    textViewDescription.text = alarm.description
                    textViewDescription.visibility = android.view.View.VISIBLE
                } else {
                    textViewDescription.visibility = android.view.View.GONE
                }

                // 반복 요일 표시
                if (alarm.isRepeating && alarm.repeatDays.isNotEmpty()) {
                    textViewRepeat.text = formatRepeatDays(alarm.repeatDays)
                    textViewRepeat.visibility = android.view.View.VISIBLE
                } else {
                    textViewRepeat.visibility = android.view.View.GONE
                }

                switchEnabled.isChecked = alarm.isEnabled
                switchEnabled.setOnCheckedChangeListener { _, isChecked ->
                    onToggleAlarm(alarm, isChecked)
                }

                imageViewDelete.setOnClickListener {
                    onDeleteAlarm(alarm)
                }

                // 비활성화된 알람은 흐리게 표시
                root.alpha = if (alarm.isEnabled) 1.0f else 0.5f
            }
        }

        private fun formatRepeatDays(repeatDays: Set<Int>): String {
            val dayNames = mapOf(
                1 to "월", 2 to "화", 3 to "수", 4 to "목",
                5 to "금", 6 to "토", 7 to "일"
            )

            return repeatDays.sorted()
                .mapNotNull { dayNames[it] }
                .joinToString(", ")
        }
    }

    private class AlarmDiffCallback : DiffUtil.ItemCallback<Alarm>() {
        override fun areItemsTheSame(oldItem: Alarm, newItem: Alarm): Boolean =
            oldItem.id == newItem.id

        override fun areContentsTheSame(oldItem: Alarm, newItem: Alarm): Boolean =
            oldItem == newItem
    }
}
<?xml version="1.0" encoding="utf-8"?>
<androidx.cardview.widget.CardView xmlns:android="http://schemas.android.com/apk/res/android"
xmlns:app="http://schemas.android.com/apk/res-auto"
xmlns:tools="http://schemas.android.com/tools"
android:layout_width="match_parent"
android:layout_height="wrap_content"
android:layout_margin="4dp"
app:cardCornerRadius="8dp"
app:cardElevation="2dp">
<androidx.constraintlayout.widget.ConstraintLayout
android:layout_width="match_parent"
android:layout_height="wrap_content"
android:padding="16dp">
<TextView
android:id="@+id/textViewTime"
android:layout_width="0dp"
android:layout_height="wrap_content"
android:textSize="24sp"
android:textStyle="bold"
android:textColor="@android:color/black"
app:layout_constraintEnd_toStartOf="@+id/switchEnabled"
app:layout_constraintStart_toStartOf="parent"
app:layout_constraintTop_toTopOf="parent"
tools:text="09:30" />
<TextView
android:id="@+id/textViewTitle"
android:layout_width="0dp"
android:layout_height="wrap_content"
android:layout_marginTop="4dp"
android:textSize="16sp"
android:textColor="@android:color/black"
app:layout_constraintEnd_toStartOf="@+id/switchEnabled"
app:layout_constraintStart_toStartOf="parent"
app:layout_constraintTop_toBottomOf="@+id/textViewTime"
tools:text="기상 알람" />
<TextView
android:id="@+id/textViewDescription"
android:layout_width="0dp"
android:layout_height="wrap_content"
android:layout_marginTop="2dp"
android:textSize="14sp"
android:textColor="@android:color/darker_gray"
android:visibility="gone"
app:layout_constraintEnd_toStartOf="@+id/switchEnabled"
app:layout_constraintStart_toStartOf="parent"
app:layout_constraintTop_toBottomOf="@+id/textViewTitle"
tools:text="일어날 시간입니다"
tools:visibility="visible" />
<TextView
android:id="@+id/textViewRepeat"
android:layout_width="0dp"
android:layout_height="wrap_content"
android:layout_marginTop="4dp"
android:textSize="12sp"
android:textColor="@color/colorPrimary"
android:visibility="gone"
app:layout_constraintEnd_toStartOf="@+id/switchEnabled"
app:layout_constraintStart_toStartOf="parent"
app:layout_constraintTop_toBottomOf="@+id/textViewDescription"
tools:text="월, 화, 수, 목, 금"
tools:visibility="visible" />
<androidx.appcompat.widget.SwitchCompat
android:id="@+id/switchEnabled"
android:layout_width="wrap_content"
android:layout_height="wrap_content"
app:layout_constraintBottom_toBottomOf="parent"
app:layout_constraintEnd_toEndOf="parent"
app:layout_constraintTop_toTopOf="parent" />
<ImageView
android:id="@+id/imageViewDelete"
android:layout_width="24dp"
android:layout_height="24dp"
android:layout_marginEnd="8dp"
android:src="@drawable/ic_delete"
android:background="?attr/selectableItemBackgroundBorderless"
android:contentDescription="알람 삭제"
app:layout_constraintBottom_toBottomOf="@+id/switchEnabled"
app:layout_constraintEnd_toStartOf="@+id/switchEnabled"
app:layout_constraintTop_toTopOf="@+id/switchEnabled" />
</androidx.constraintlayout.widget.ConstraintLayout>
</androidx.cardview.widget.CardView>
앱을 빌드하면 아래와 같이 푸시 알림 권한 요청 다이얼로그가 뜰 것이다.

첫 화면은 아래와 같이 표시될 것이다.

알람 생성 화면은 이렇다.

반복 스위치를 on으로 변경하면 아래 UI가 표시된다.

알람이 생성되면 AlarmListActivity가 아래처럼 바뀌어 보인다.

알림이 오면 아래처럼 표시된다.
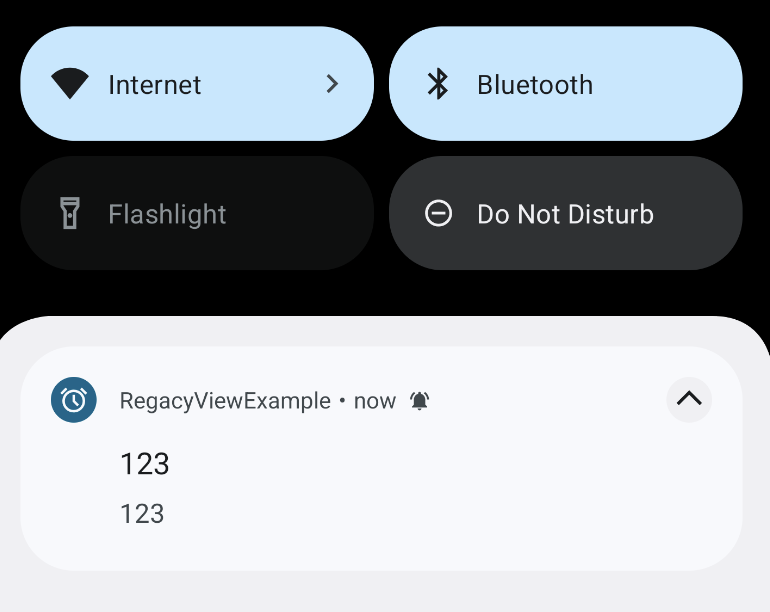
클릭하면 AlarmReceiver에서 설정한 대로 AlarmListActivity로 이동한다.
예시기 때문에 구현은 여기서 끝이지만 알림을 받고 특정 행동을 하기 전까지 계속 알림음을 울리게 하고 싶다면 포그라운드 서비스도 같이 사용해서 구현할 수 있다.
참고한 포스팅)
https://mubaraknative.medium.com/creating-a-alarm-using-alarmmanager-in-android-e27a4283d39f
Creating a alarm using AlarmManager in Android
In this article i will show how to create an alarm using the AlarmManager class and what are the methods we will need to care about and…
mubaraknative.medium.com
'Android' 카테고리의 다른 글
| [Android] 모듈 생성 시 Android Library, Java or Kotlin Library 선택 방법 (0) | 2025.09.11 |
|---|---|
| [Android] 앱스플라이어 원링크 사용법 (0) | 2025.09.11 |
| [Android] XML용 NumberPicker 커스텀 라이브러리 사용법 (0) | 2025.07.18 |
| [Android] 다운로드 매니저(DownloadManager) 구현 방법 (0) | 2025.07.07 |
| [Android] 안드로이드 16(바클라바) 변경점 (0) | 2025.07.07 |


